Cargo Holder Assembly
This section shows step by step how to build the Cargo Holder of the EduArt MiniBot.

Step 1:
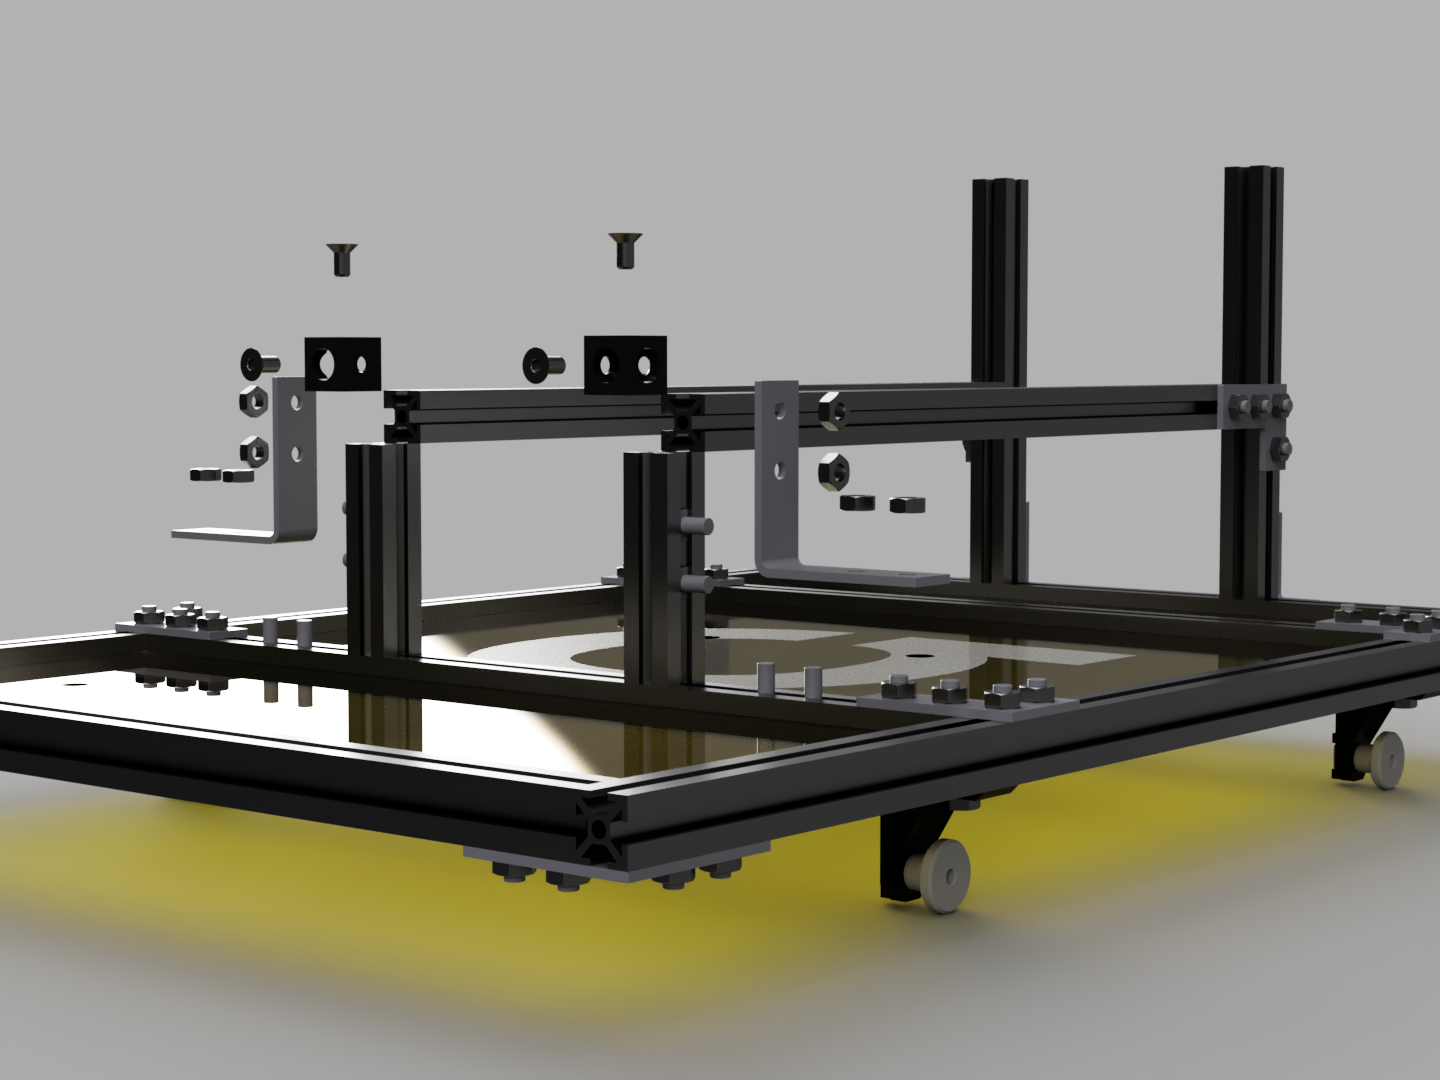
Assembly of the Cargo Holder Base.
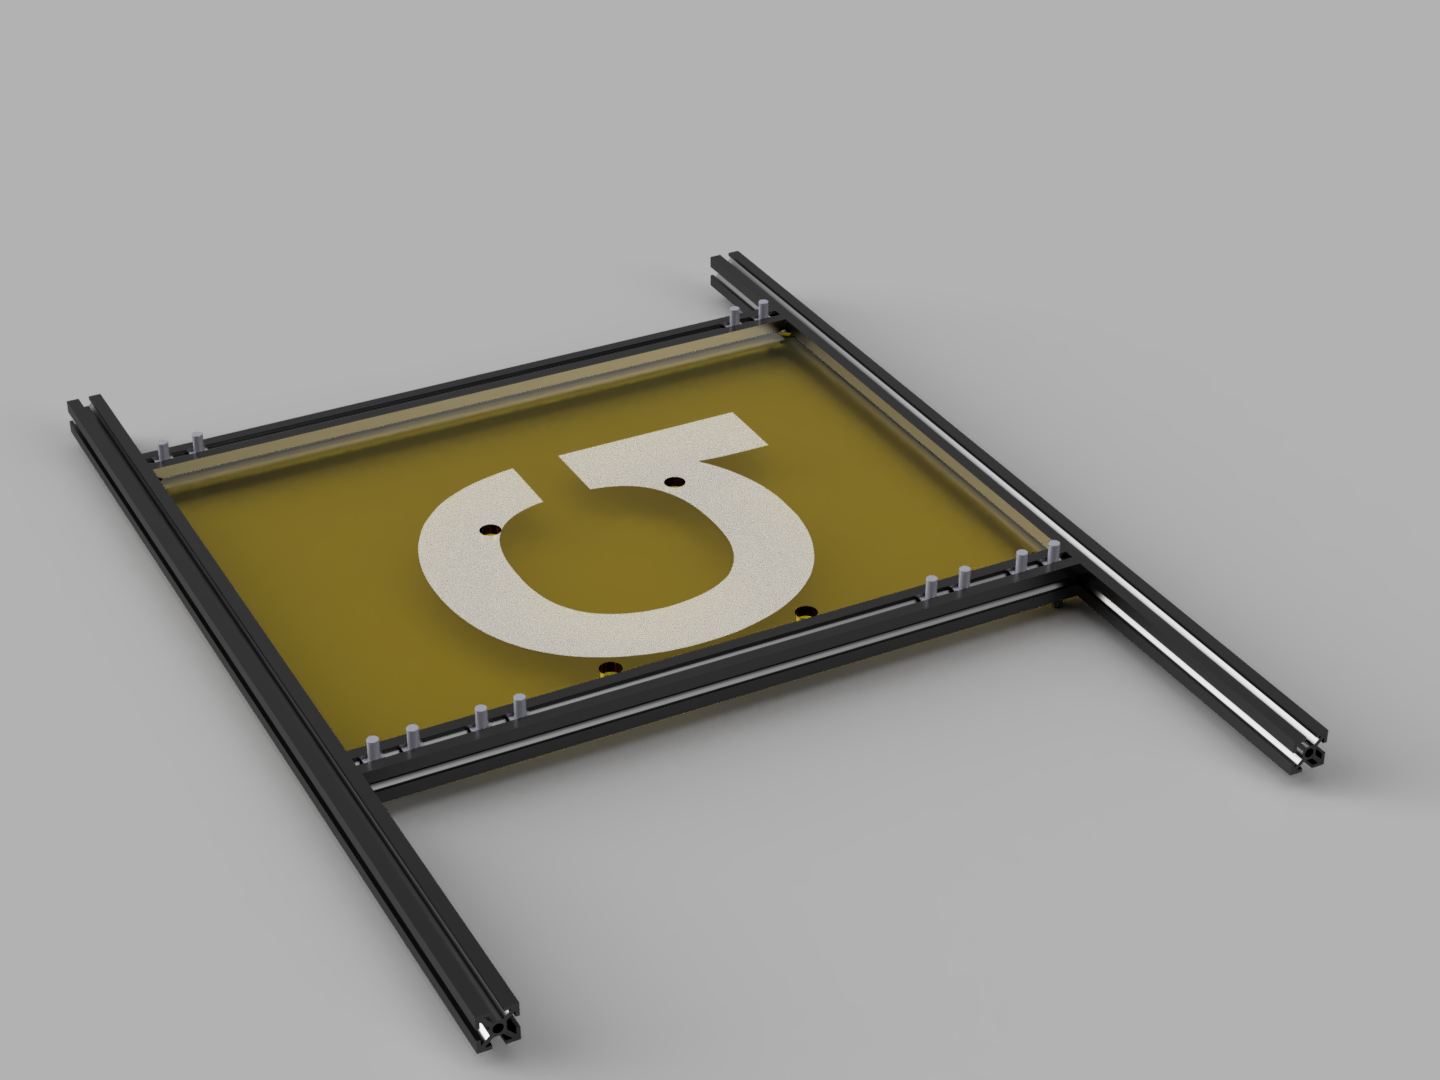 |  |
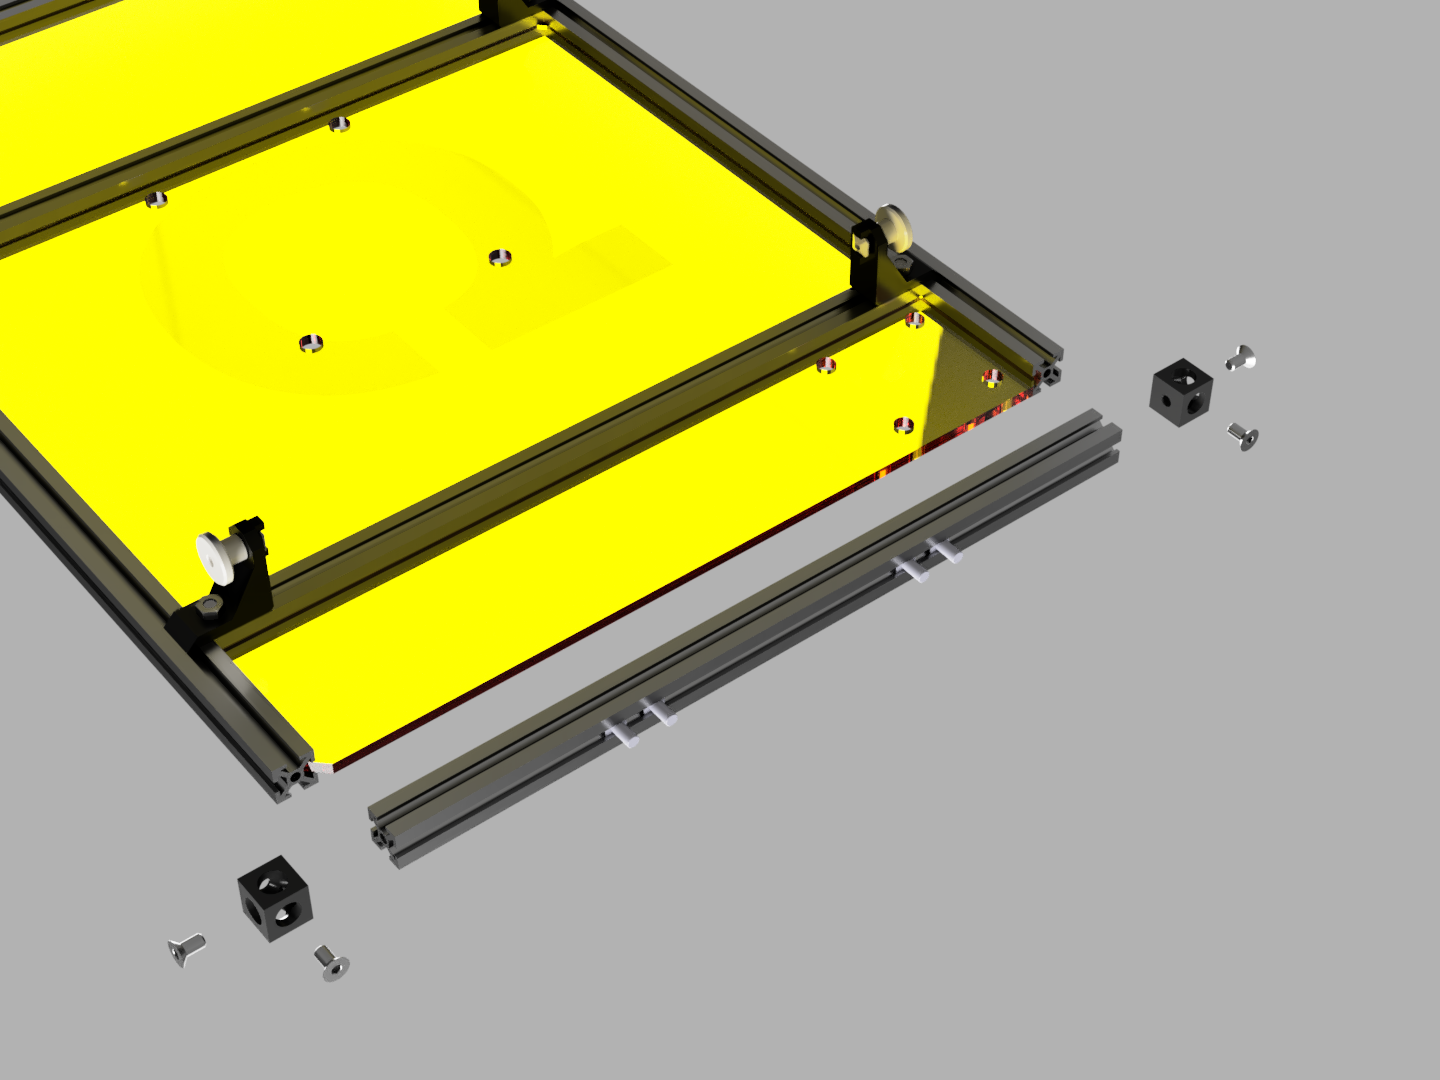
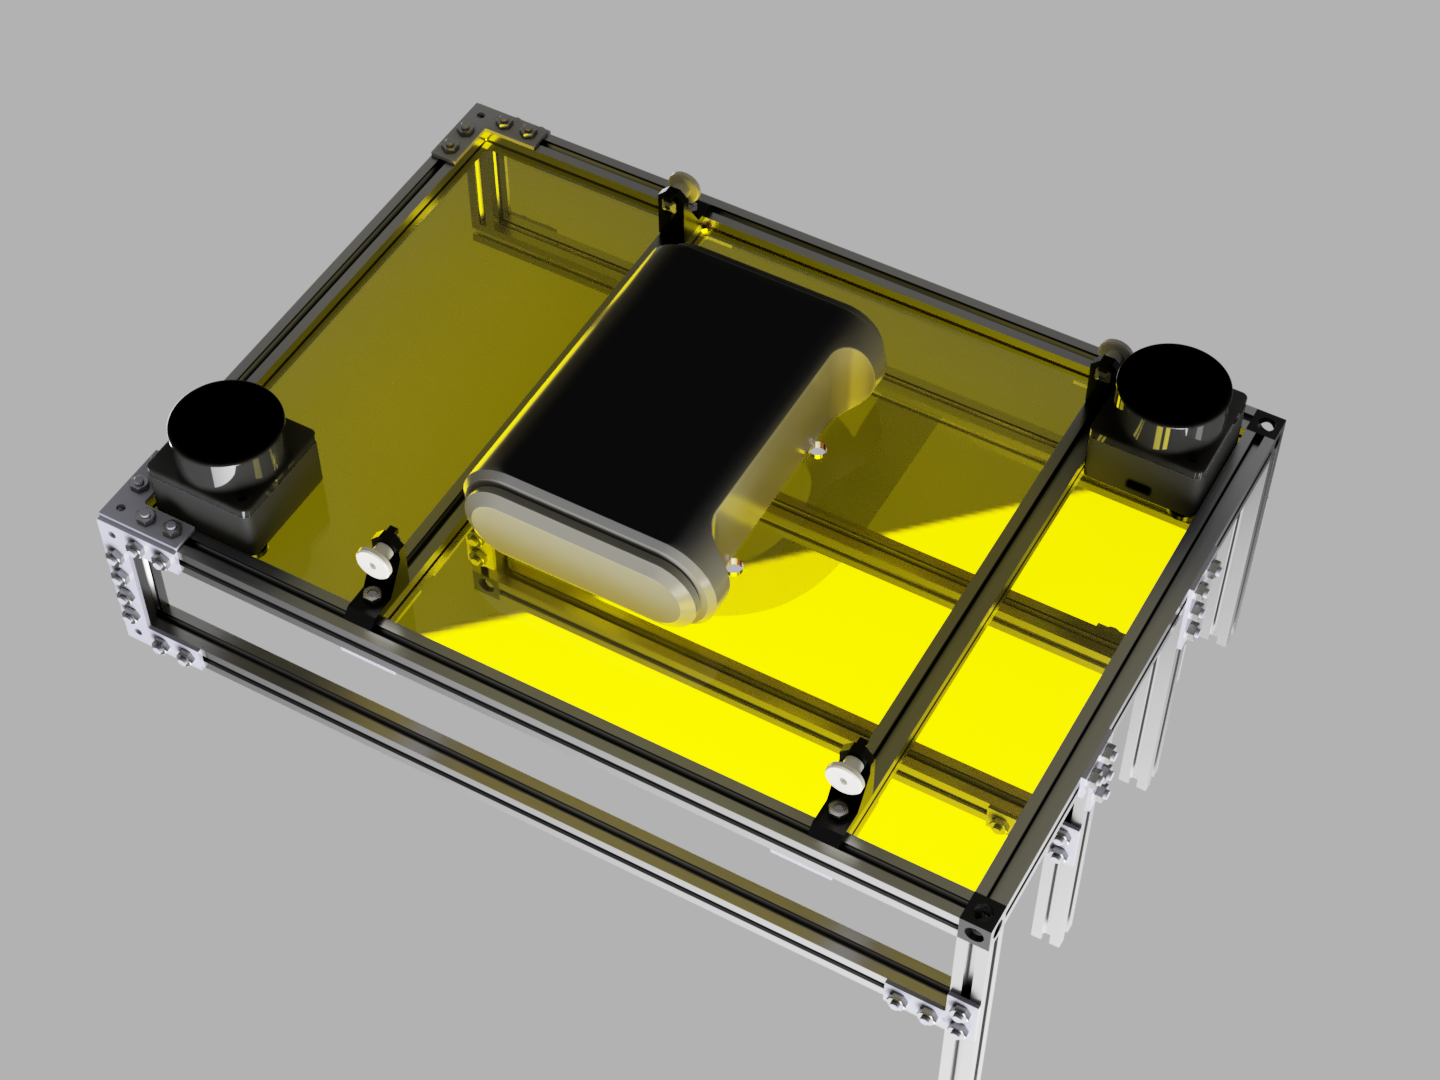
Place the Top Plate Middle between 2 200mm MakerBeams the front is determined by the holes closest to a MakerBeam and the logo is engraved on the top surface. Put 8 M3x6 square head screws in the top slot of the front MakerBeam and 4 in the top slot of the back MakerBeam. Also put 2 square head screws in the bottom slot of the front and back MakerBeam. Place the 300mm MakerBeams on the two free sides of the Top Plate Middle.
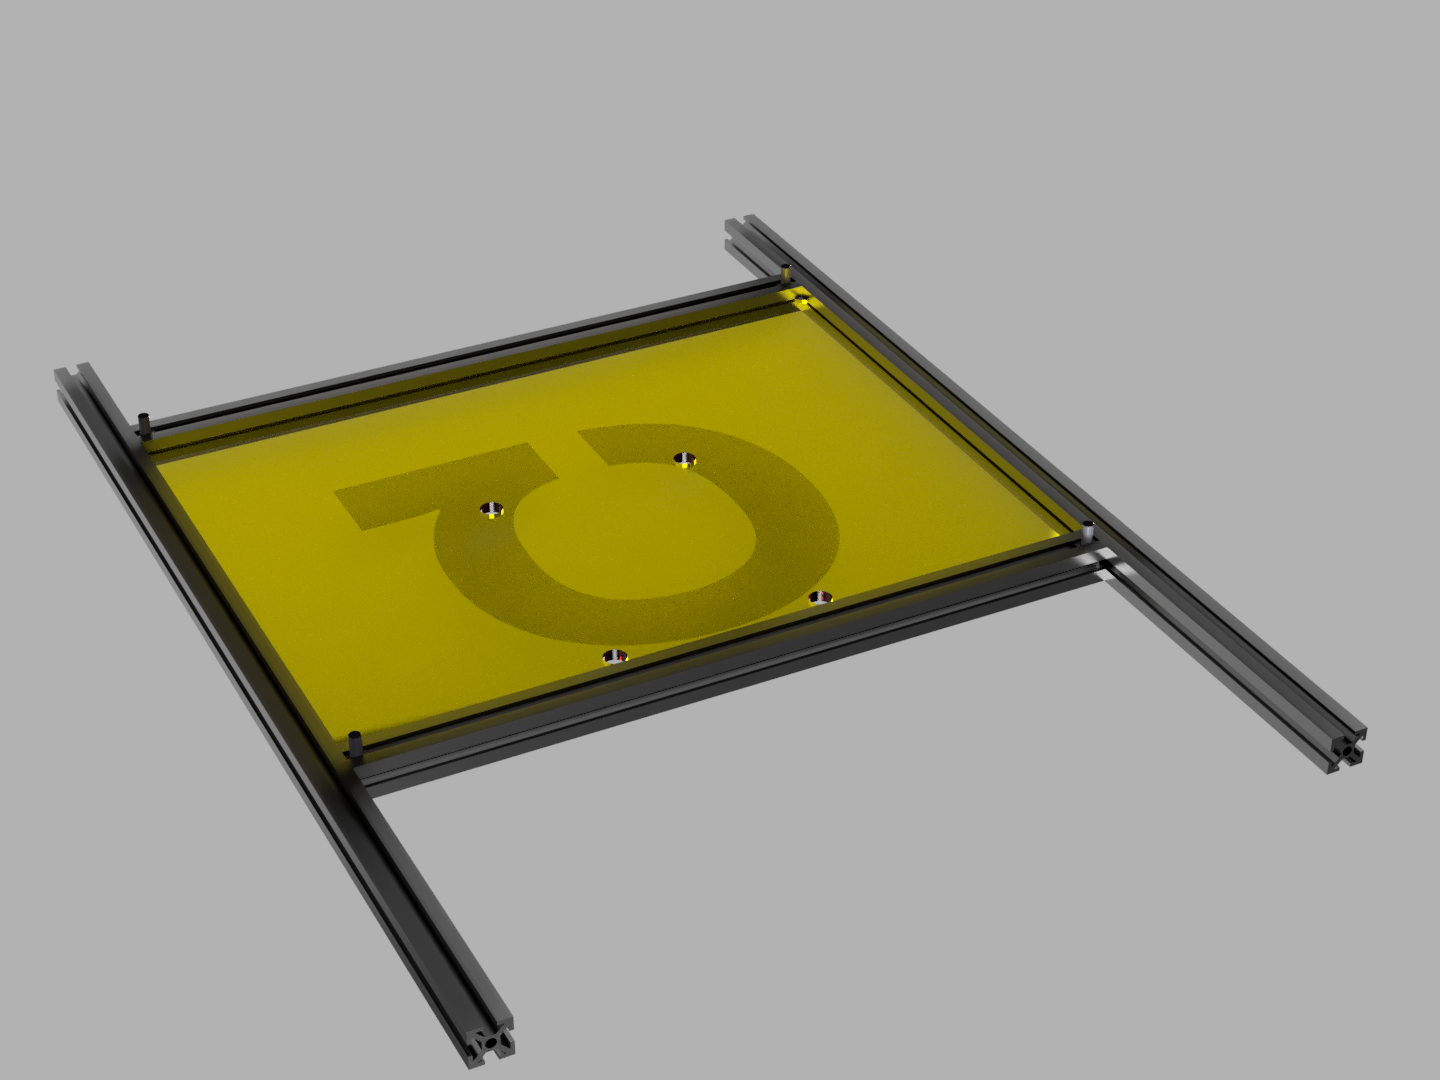
Place the Corner Brackets on the four square head screws on the bottom side of the Cargo Holder. The lip on the Corner Brackets should slot in to the 300mm MakerBeams and secure them in place. Screw the Corner Brackets in place with M3 nuts. Place square head screws on other side of the Corner Brackets and screw the M3 knurled nut on them.
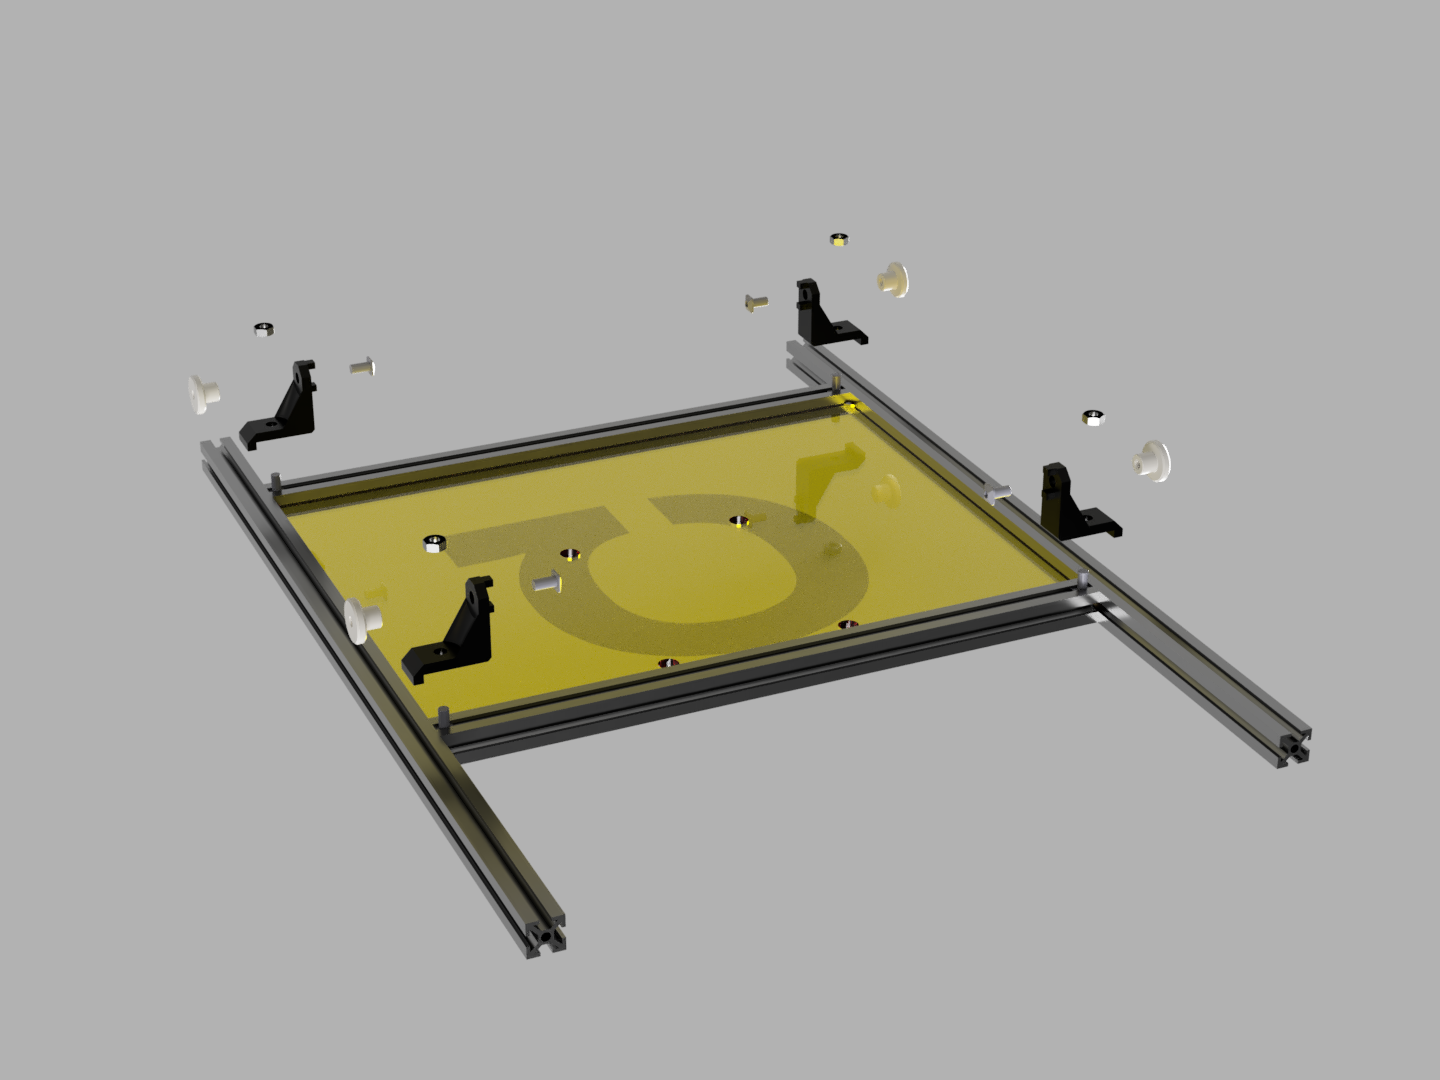
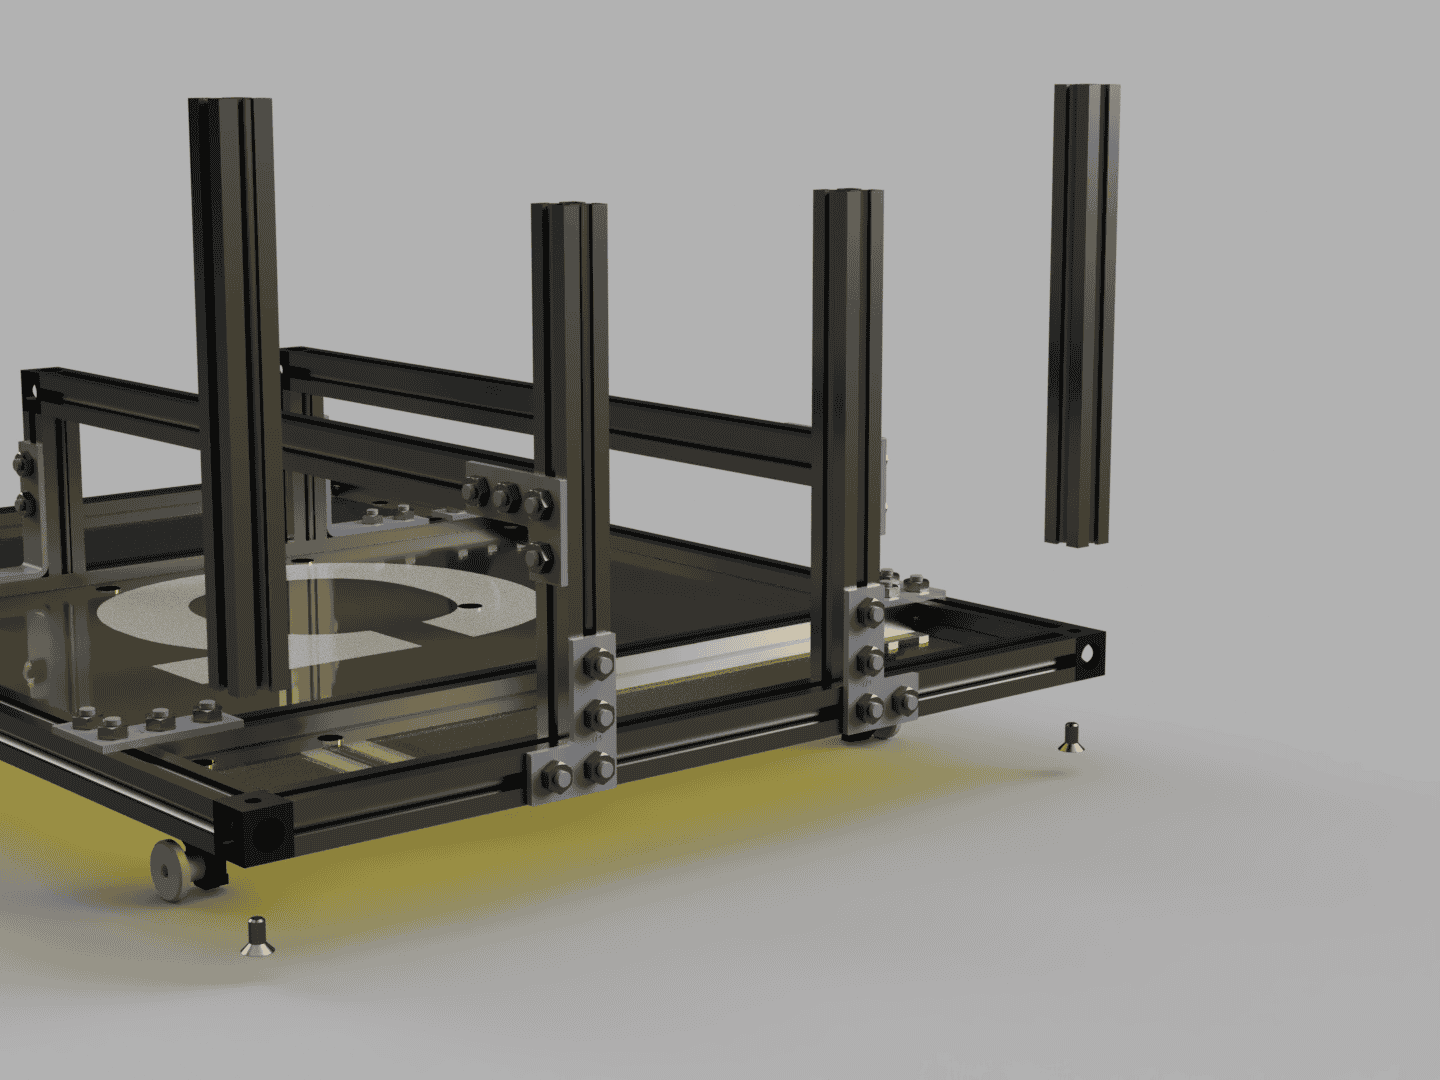
Insert the Top Plate Front in the open slot on the front of the Cargo Holder so that lidar placement would be on the front right corner. Put four square head screws in a 200mm MakerBeam and place it on the empty side of the Top Plate Front. Insert 2 square head screws in the 300mm MakerBeams on each side. Use 2 MakerBeam Right Angle Brackets and 8 M3 nuts to connect the MakerBeams.
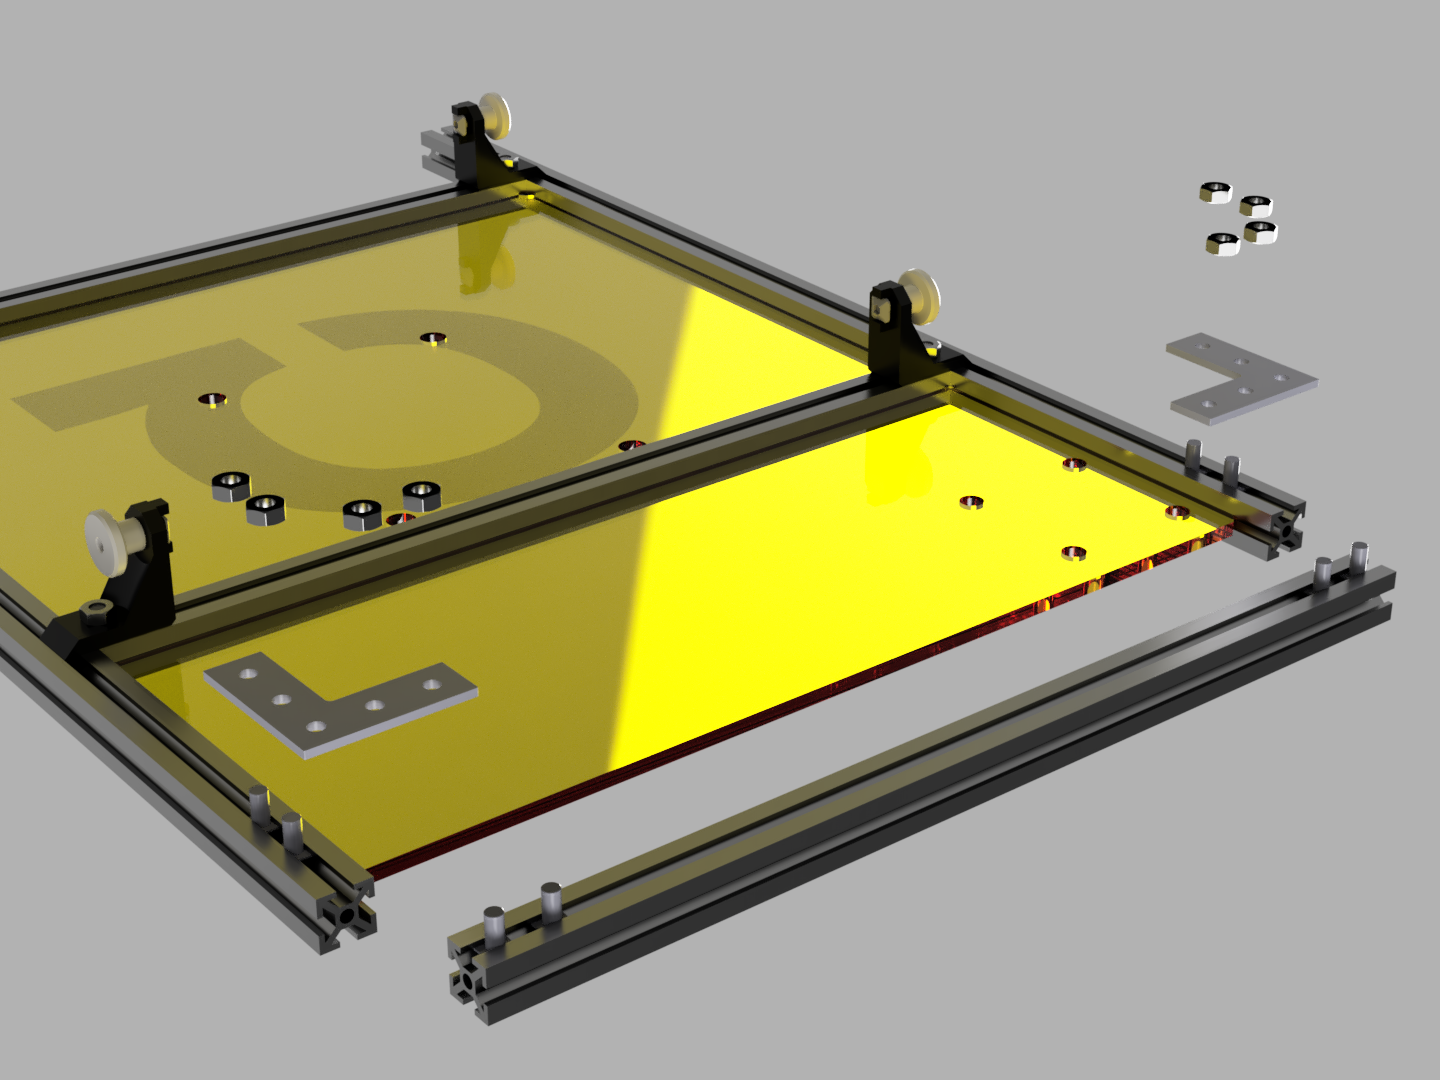
Insert the Top Plate Back in the open slot on the back of the Cargo Holder so that the lidar placement would be at the left back corner. Attach a Corner Cube on each of the 300mm MakerBeams with M3x6 countersunk head screws. Insert 4 square head screws in to a 200mm MakerBeam pointing back from the Cargo Holder. Place it on the empty side of the Top Plate Back. Then attach it with countersunk head screws to the corner cubes.
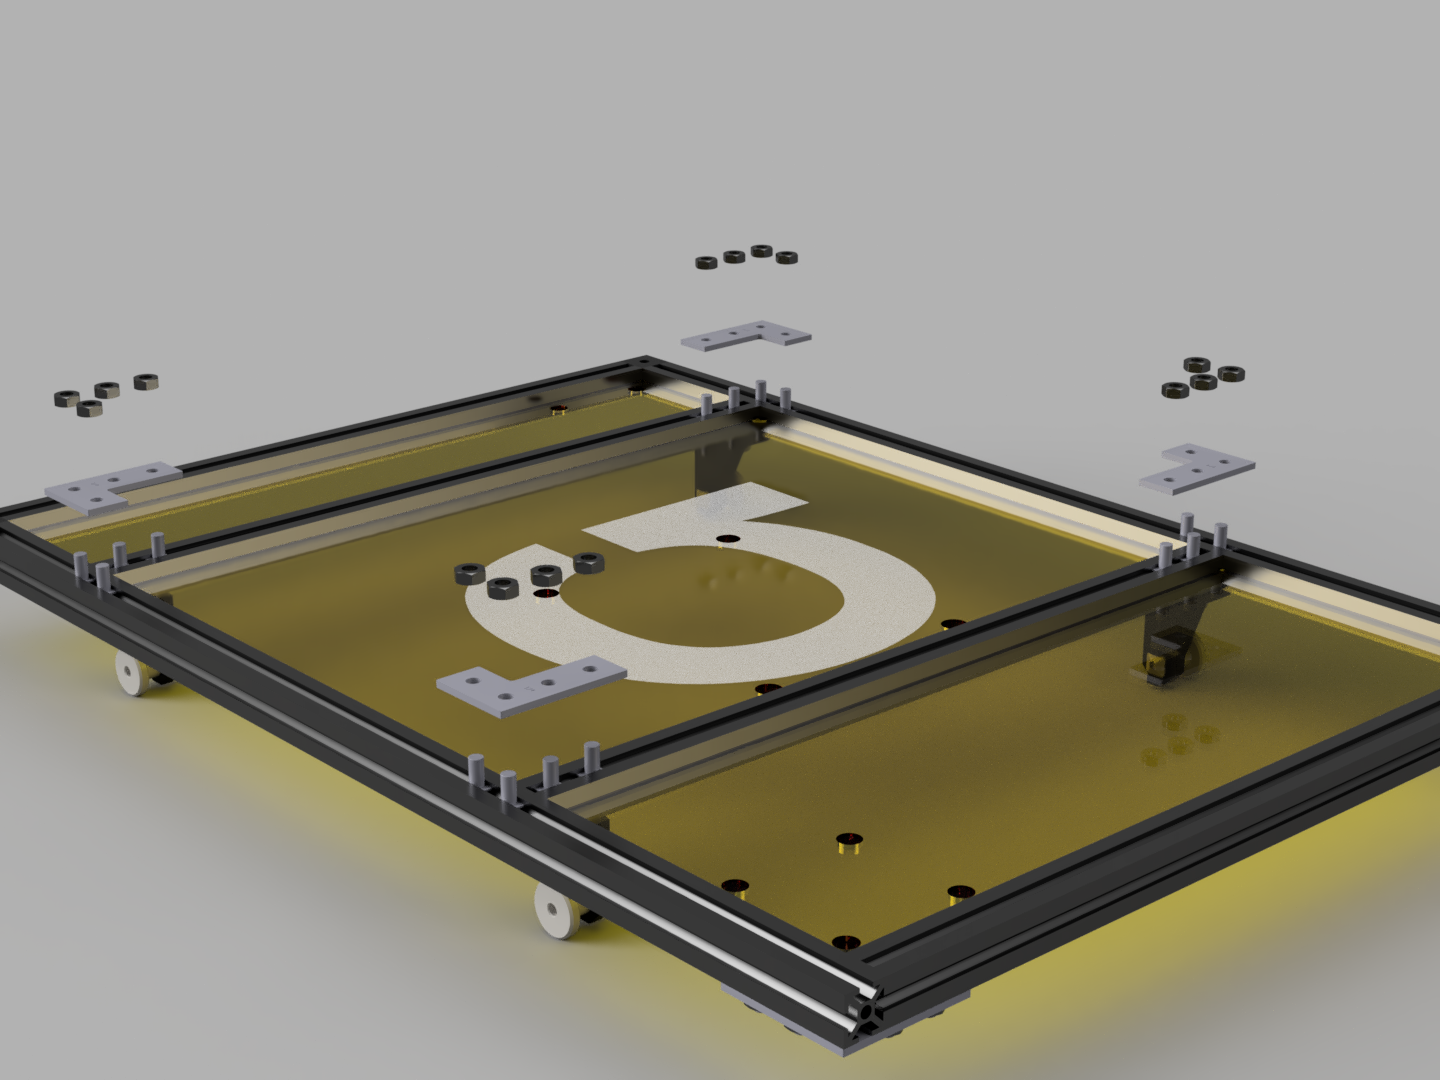
On the top side of the Cargo Holder. Insert 4 square head screws in each of the top slots of the 300mm MakerBeams. Attach the two middle MakerBeams to the 300mm MakerBeams with four 90deg Brackets and 16 M3 nuts.
Step 2:
Assembly of the railing.
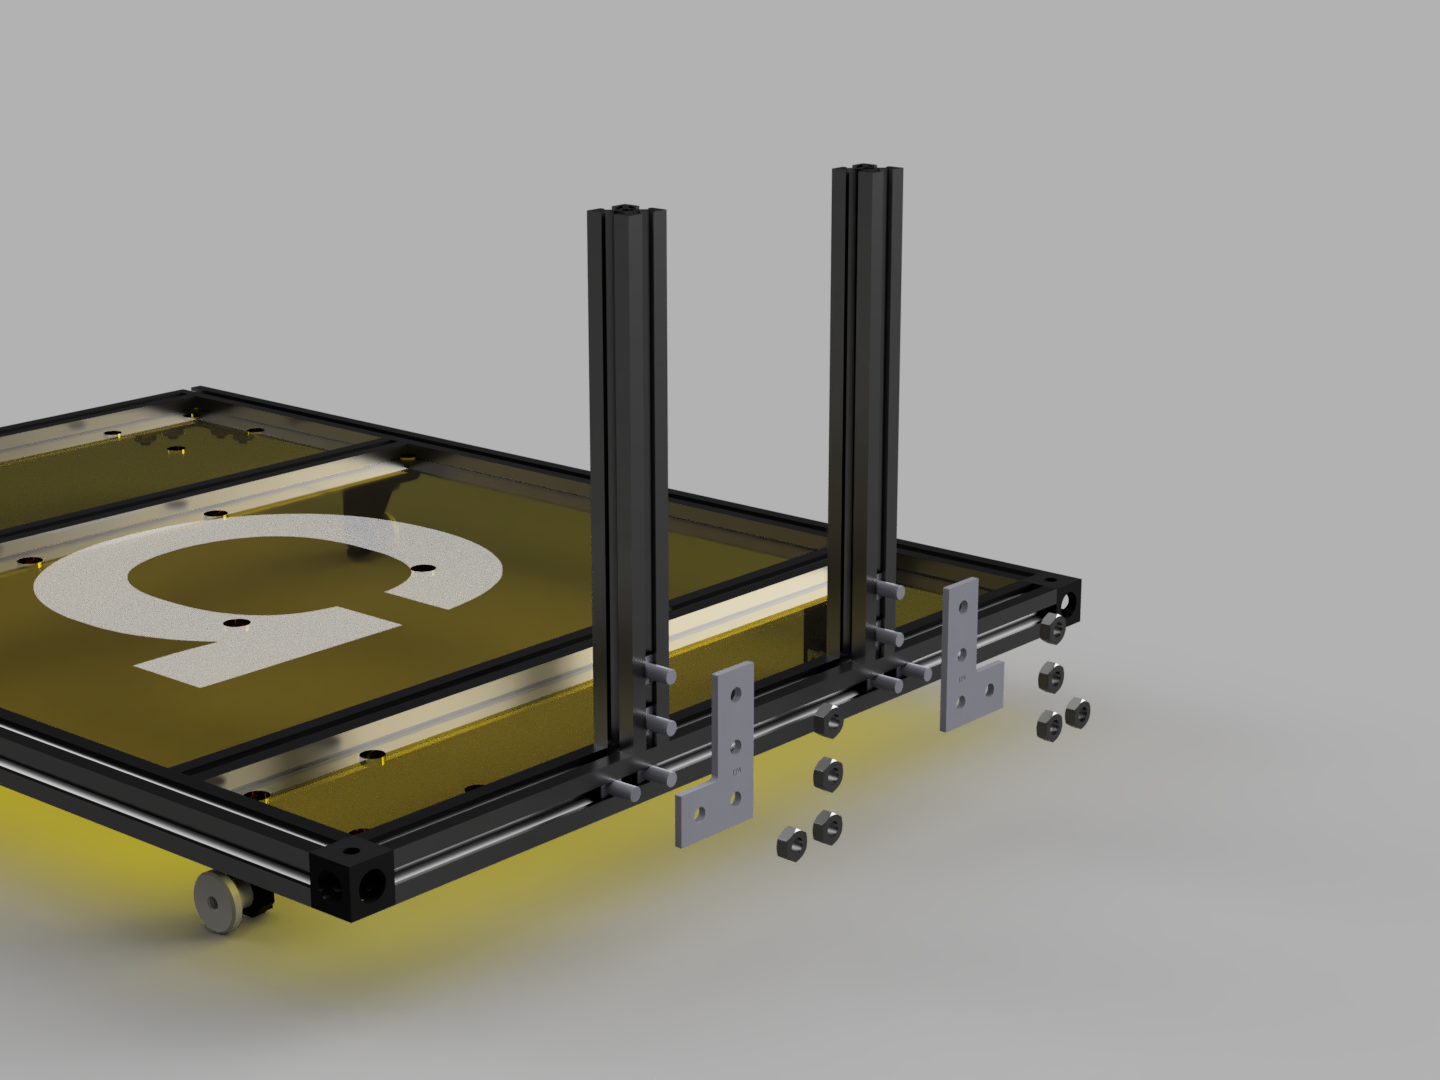
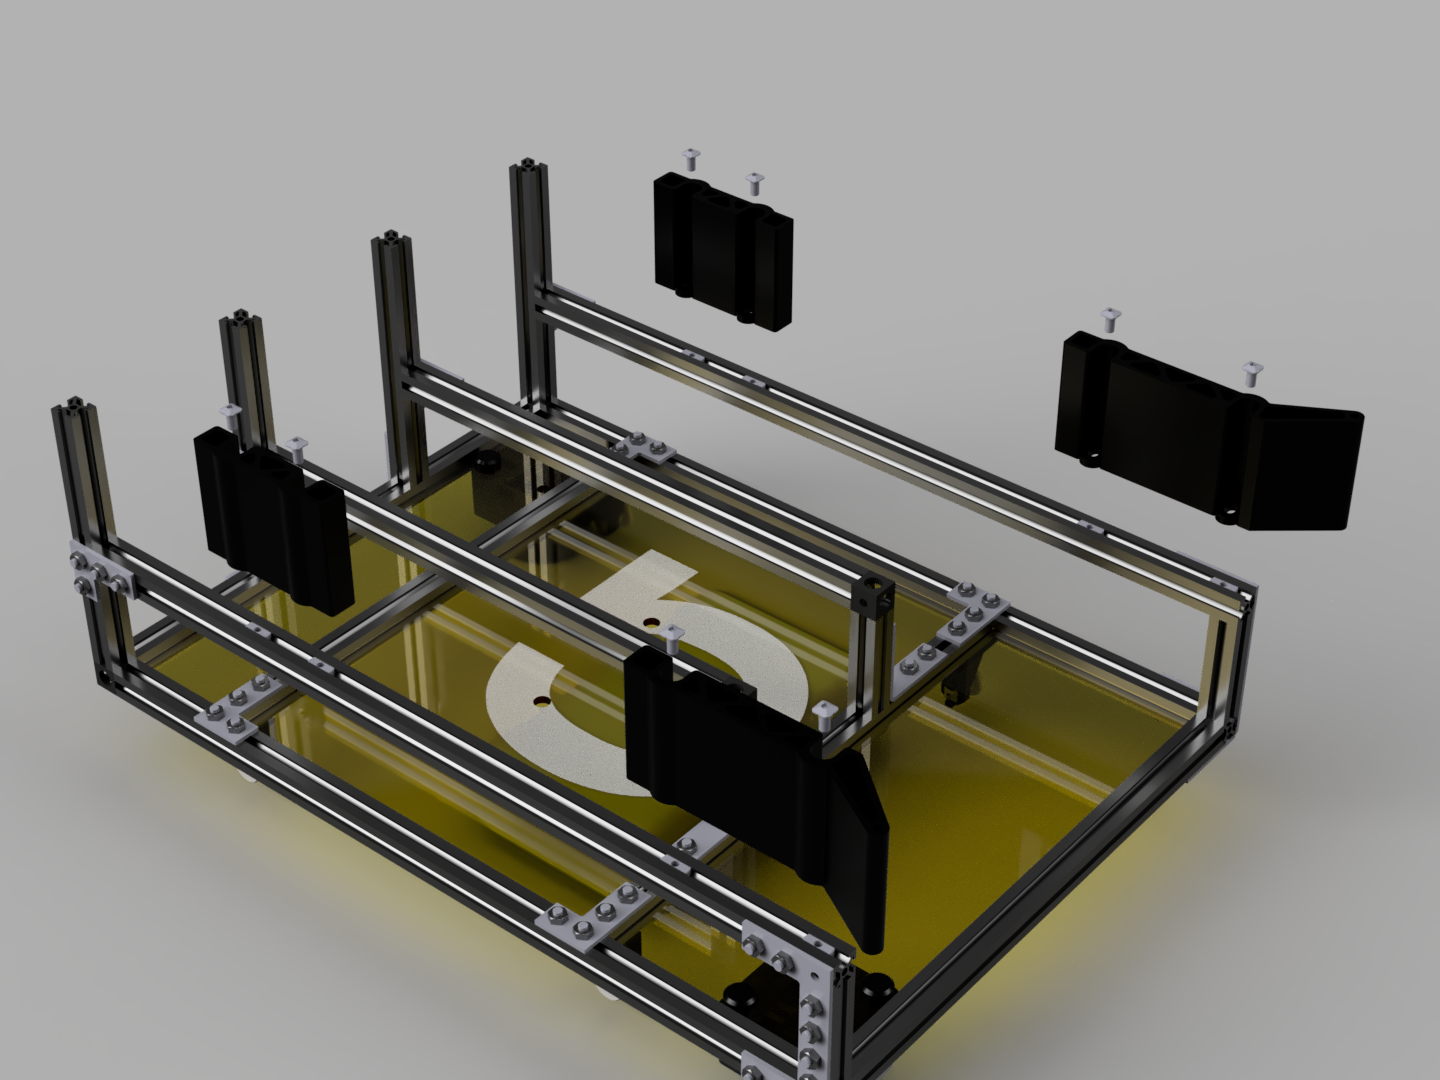
Place 2 100mm MakerBeams with 2 square head screws in each on the back MakerBeam of the Cargo Holder. Then secure each of them with a 90deg Bracket and 4 M3 nuts.
Insert 2 square head screws on the outsides of the 100mm MakerBeams and 2 square head screws in two 200mm MakerBeams. Attach a 200mm MakerBeam to each of the 100mm MakerBeam with a 90deg Bracket and 4 M3 nuts.
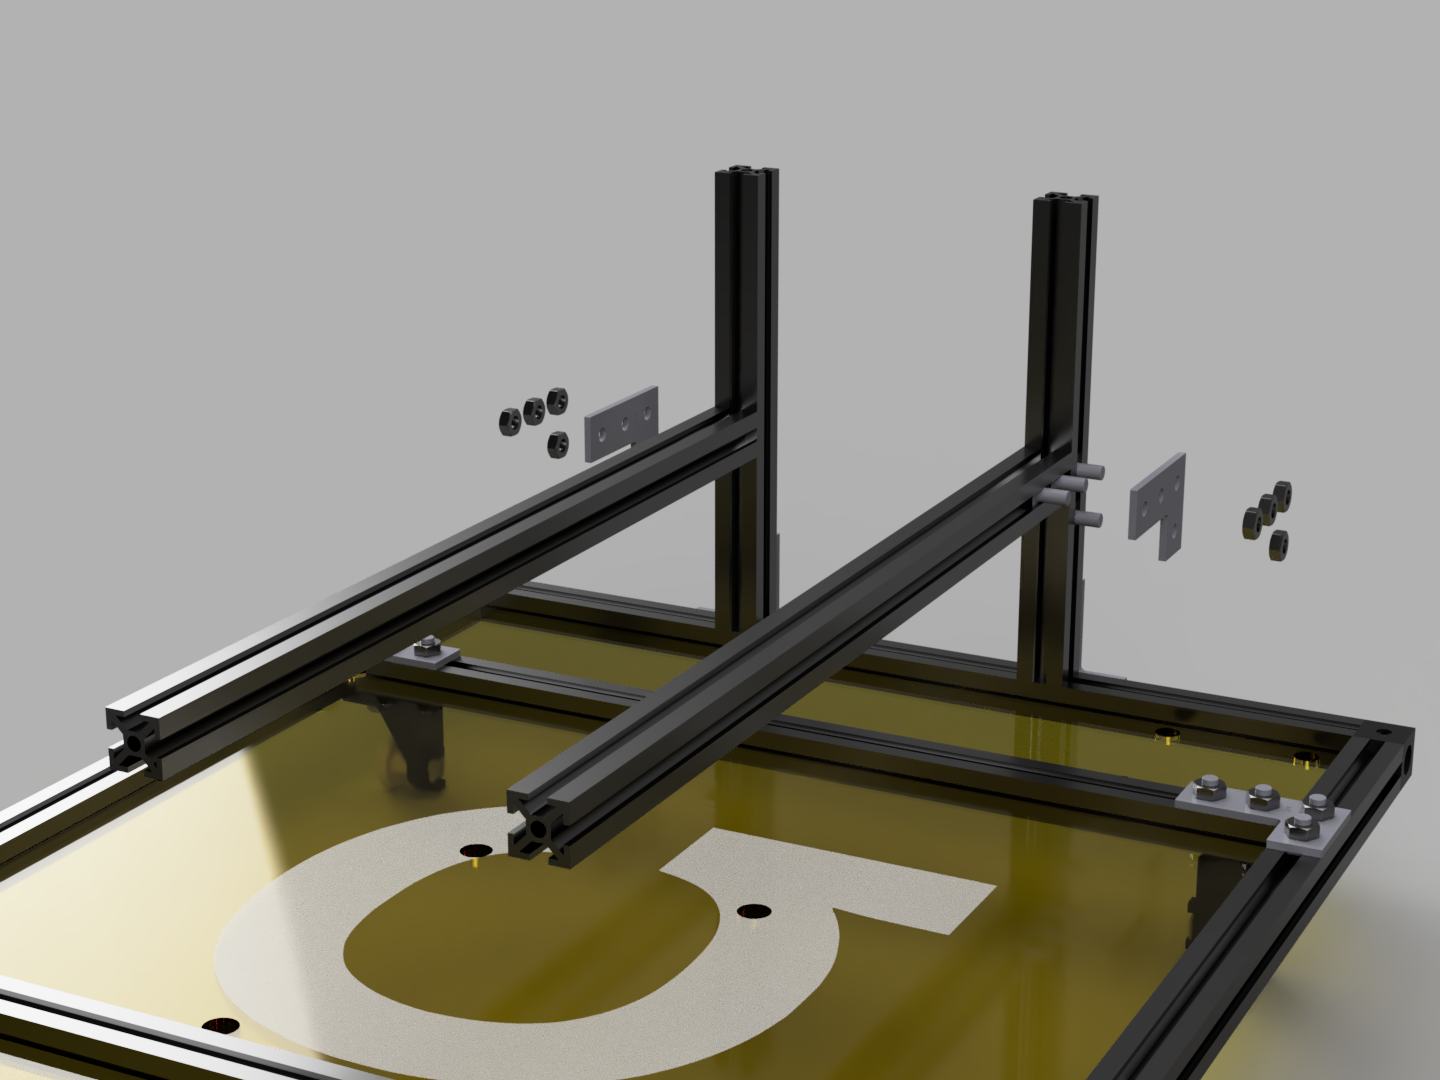
Insert 2 square head screws in 2 40mm MakerBeams. Then attach them with Corner Brackets and 4 M3 screws to the Middle Front MakerBeam of the Cargo Holder. Attach the horizontal 200mm MakerBeams with the 40mm MakerBeams with Corner Cubes and 4 M3 countersunk head screws.
Place a 100mm MakerBeam on each of the Corner Cubes and secure them with M3 countersunk head screws.
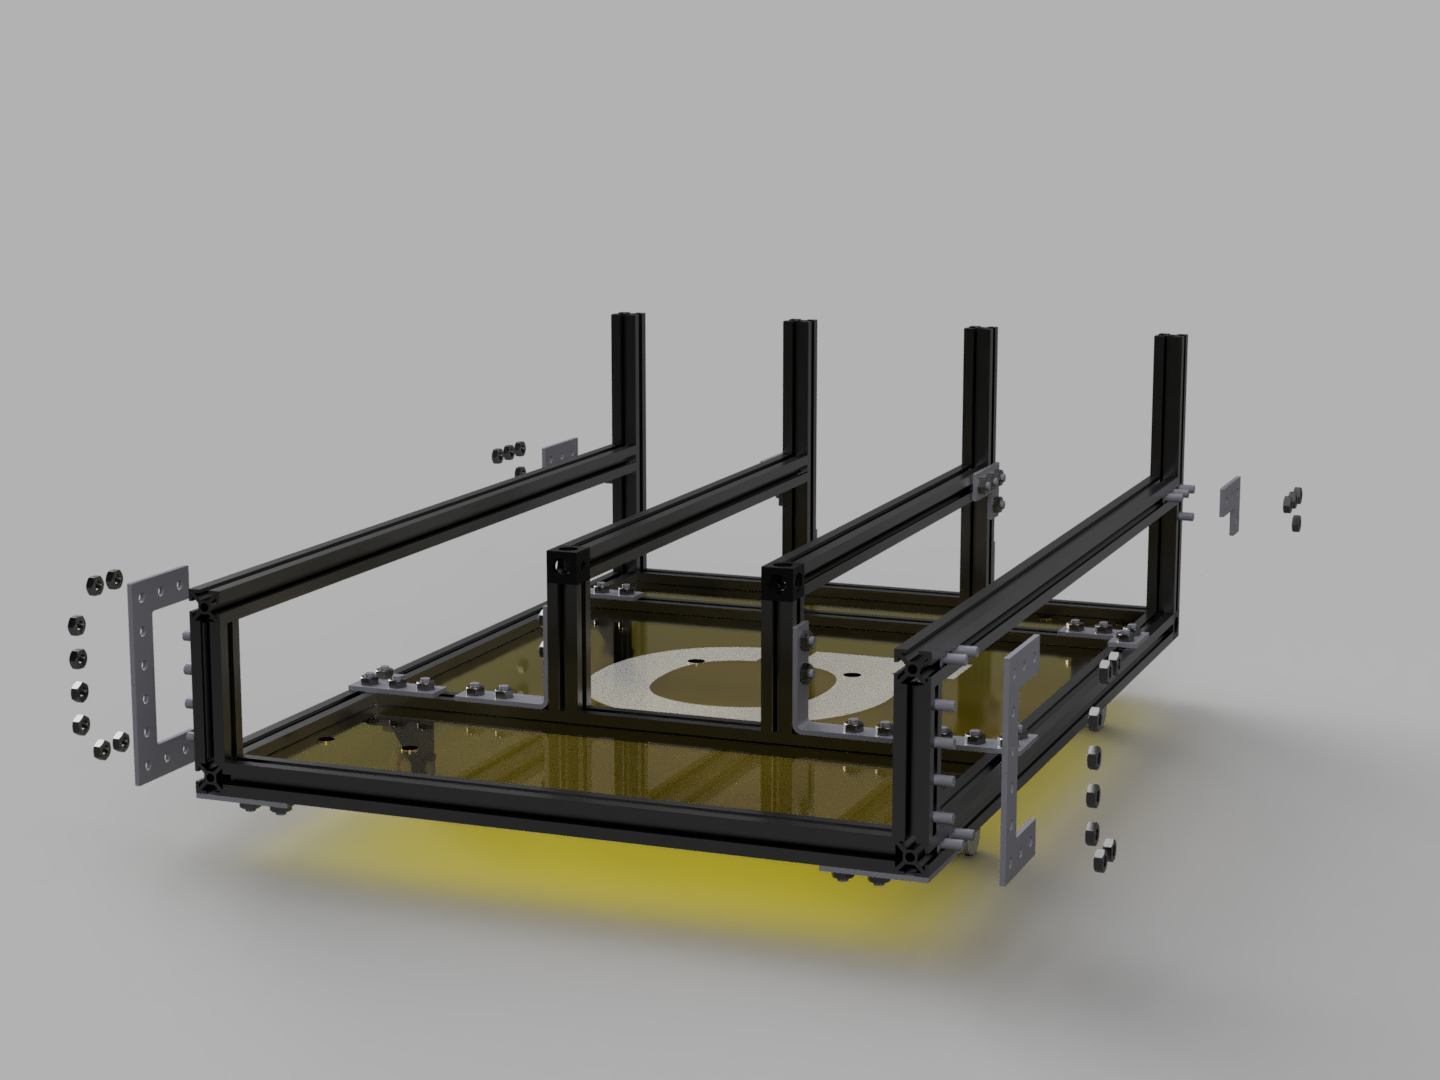
Insert 4 square head screws in 2 40mm MakerBeams and 2 in the 300mm MakerBeams of the Cargo Holder Base. Then attach the 40mm MakerBeams with Right Angle Brackets and 4 M3 nuts to the corners of the Cargo Holder Base. Insert 4 square head screws in to two 300mm MakerBeams and 2 square head screws in to the outside of the 100mm MakerBeams at the corners. Connect the 300mm MakerBeam with 90deg Brackets and 4 M3 nuts to the 100mm MakerBeams at the corners. Connect the 300mm MakerBeams with Right Angle Brackets and 4 M3 nuts to the 40mm MakerBeams at the corners.
Step: 3
Mounting the electronics.
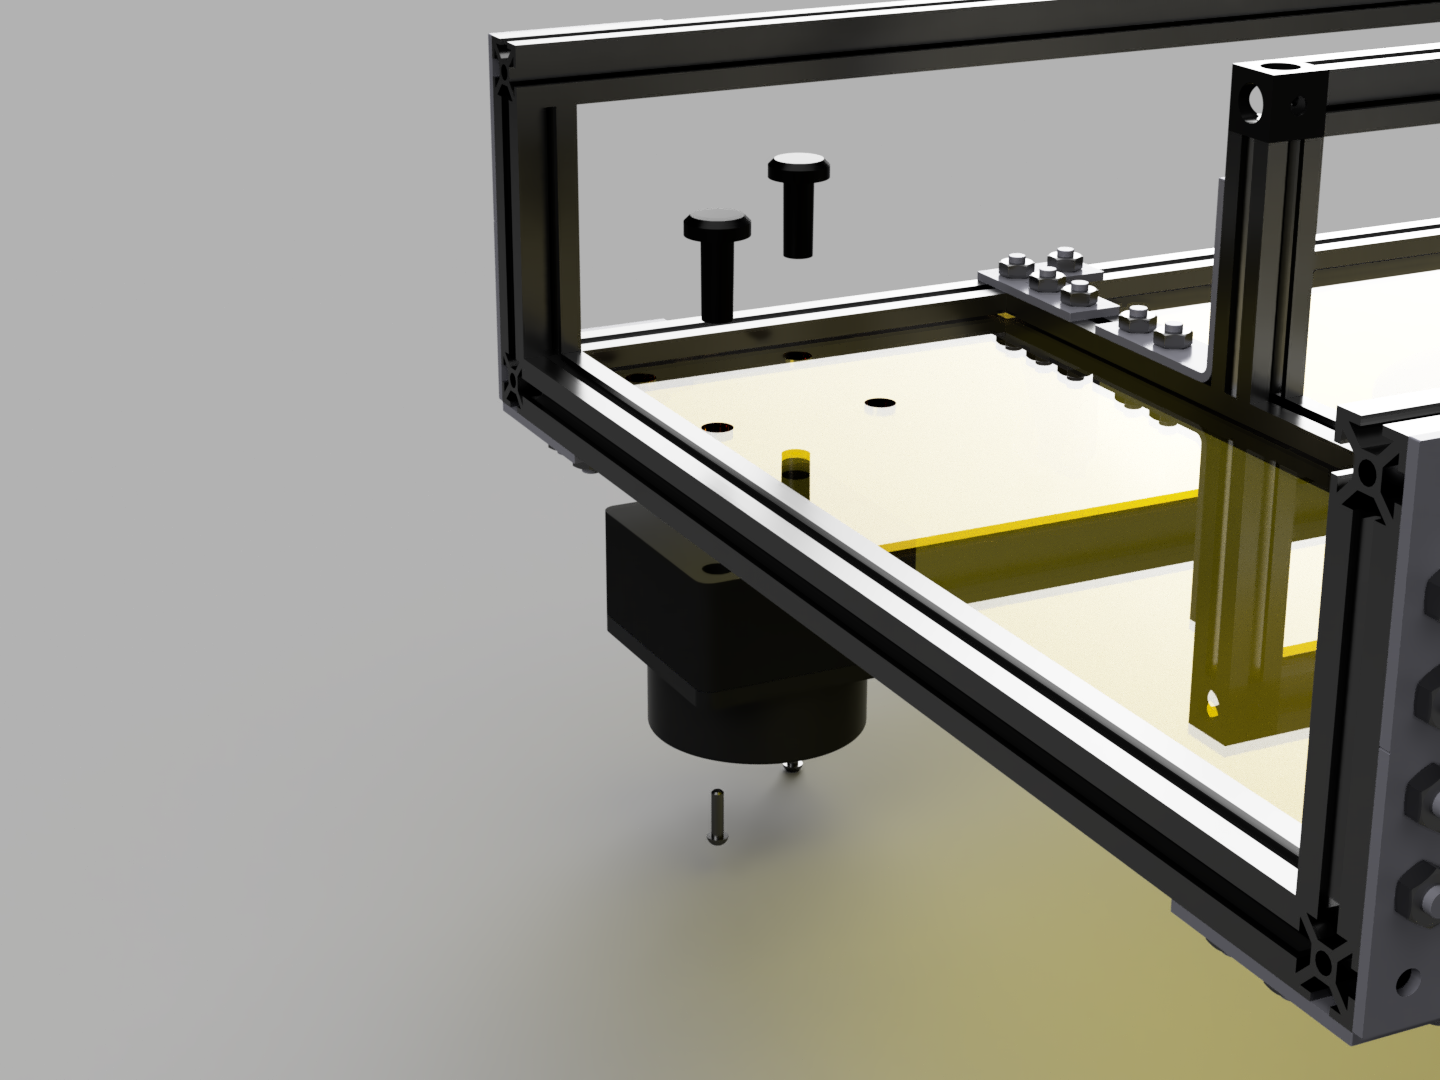
Attach the lidars with 2 Lidar Screws and 2 M2x8 round head screws to the front and back positions.
Mount the Router on the underside of the Cargo Holder with two zip ties at the holes in the Top Middle Plate.
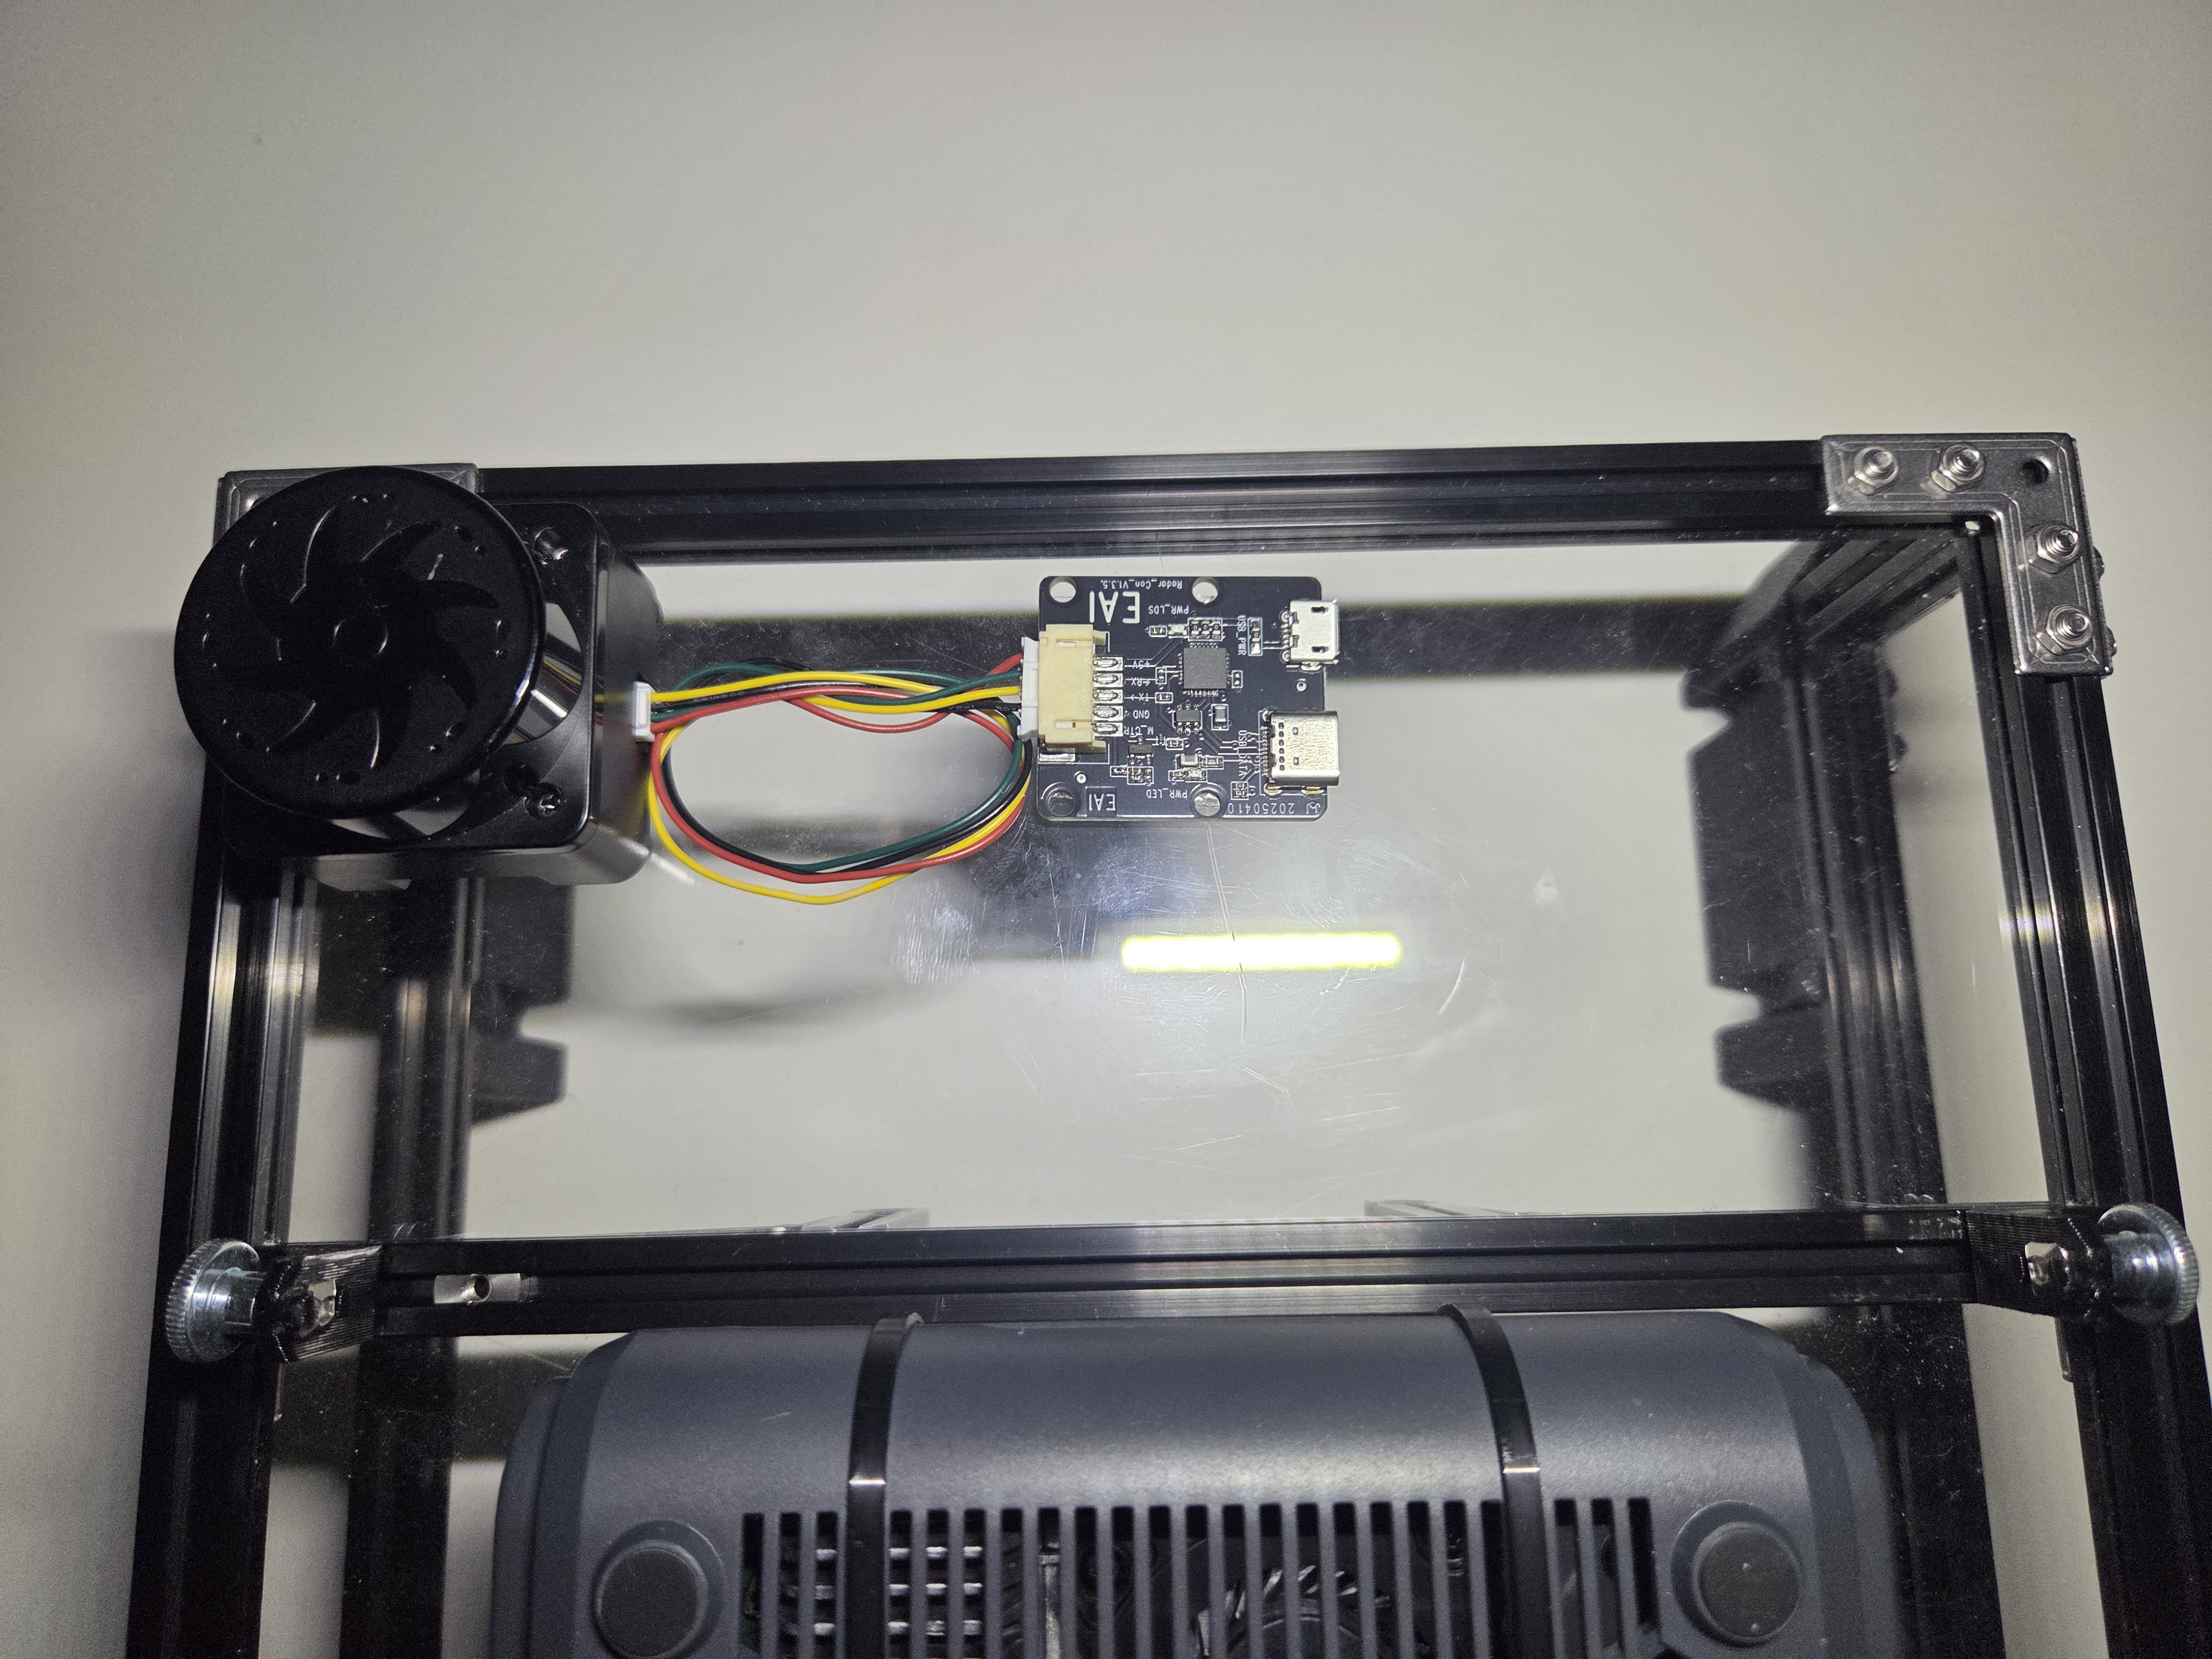
Take the lidar PCBs out of they're housing and attach them on Top Front and Bottom Plates with double-sided adhesive.
Step 4:
Attaching the Cargo Guides and finalizing.
Place 4 T-Slot nuts in each of the outer rails. Mount the Front and Back Cargo Guides on the outer left and right rails with 2 square head screws each.